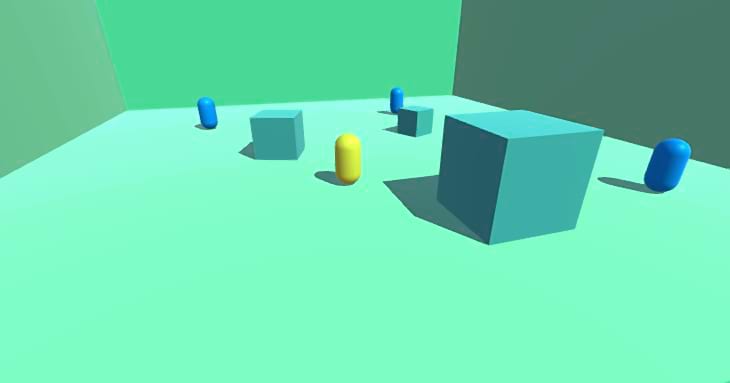
Chasing controller with Unity
Imagine you’re building a game in Unity and you want an AI-controlled character to chase a target object, cleverly dodging obstacles in its path. The traditional approach might involve using Unity’s NavMesh system for pathfinding. But what if we wanted more control over the AI’s movement and obstacle avoidance behavior? In this post, we’ll explore creating a custom AI controller script that achieves this goal.
Setting Up the Scene
First, we’ll set up a simple 3D scene with a flat surface (ground), some obstacles (cubes or other shapes), an AI character (represented by a capsule), and a target object (like a sphere) that the AI will chase.
Introducing the AI Controller Script
The core of our AI’s movement logic lies in the AIController script. Here, we’ll leverage Unity’s Rigidbody component for smooth movement and a custom obstacle avoidance system.
Essential Components
The script includes several public variables to configure the AI’s behavior:
[SerializeField] private Transform Target; // The target to chase
[SerializeField] private float MoveSpeed = 5f; // Movement speed
[SerializeField] private float RotationSpeed = 10f; // Rotation speed for smooth turning
[SerializeField] private float ObstacleAvoidanceRadius = 2f; // Radius to detect obstacles
[SerializeField] private float RaycastDistance = 3f; // Distance to check for potential collisions
[SerializeField] private float RaycastAvoidanceForce = 5f; // Strength of avoidance force for raycasts
[SerializeField] private LayerMask ObstacleLayer; // Layer mask for obstacles
Breaking Down the Script
Initialization (Start function)
In the Start function, we grab the AI character’s Rigidbody component and restrict its rotation on the X and Z axes to prevent the AI from tipping over.
private void Start()
{
    // Get the Rigidbody component
    m_Rigidbody = GetComponent<Rigidbody>();

    // Freeze rotation to prevent tipping
    m_Rigidbody.constraints = RigidbodyConstraints.FreezeRotation;
}
Core Logic (FixedUpdate function)
private void FixedUpdate()
{
    // ...
}
The FixedUpdate function is called repeatedly at a fixed interval, ensuring smooth movement updates. Here’s a breakdown of the key steps within this function:
Target Direction Calculation
We calculate the normalized direction vector from the AI to the target object. This indicates the ideal direction for the AI to move in.
if (Target == null) return;
// Calculate the desired direction toward the target
var directionToTarget = (Target.position - transform.position).normalized;
Obstacle Avoidance
We call the AvoidObstacles function to determine a steering direction based on nearby obstacles. This helps the AI deviate from its ideal path to avoid collisions.
// Adjust direction to avoid obstacles and predict collisions
var avoidanceDirection = AvoidObstacles();
Collision Prediction
We call the PredictCollisions function to perform raycast checks in multiple directions (forward, forward-right, and forward-left) from the AI. If a potential collision is detected, the AI will be steered away from that direction.
var raycastAvoidanceDirection = PredictCollisions();
Combining Directions and Movement
We combine the target direction, obstacle avoidance direction, and collision prediction direction into a final direction vector. The AI smoothly rotates towards this final direction using Quaternion.Slerp and then moves forward based on its current facing direction using the Rigidbody velocity.
// Combine all directions
var finalDirection = (directionToTarget + avoidanceDirection + raycastAvoidanceDirection).normalized;

// Smoothly rotate the AI toward the final direction
if (finalDirection.magnitude > 0.1f)
{
    var targetRotation = Quaternion.LookRotation(finalDirection);
    transform.rotation = Quaternion.Slerp(transform.rotation, targetRotation, RotationSpeed * Time.deltaTime);
}

// Move forward in the current facing direction
m_Rigidbody.linearVelocity = transform.forward * MoveSpeed;
The AvoidObstacles function identifies obstacles within the ObstacleAvoidanceRadius around the AI using the Physics.OverlapSphereNonAlloc function. It then iterates through these obstacles, calculating a direction away from each one and averaging them to create a cumulative avoidance vector. This vector steers the AI away from the general vicinity of obstacles.
private Vector3 AvoidObstacles()
{
    var avoidance = Vector3.zero;

    // Perform a non-allocating overlap sphere
    var obstacleCount = Physics.OverlapSphereNonAlloc(transform.position, ObstacleAvoidanceRadius, m_ObstacleColliders, ObstacleLayer);

    for (var i = 0; i < obstacleCount; i++)
    {
        var obstacle = m_ObstacleColliders[i];

        // Calculate a direction away from the obstacle
        var awayFromObstacle = transform.position - obstacle.ClosestPoint(transform.position);
        avoidance += awayFromObstacle.normalized / awayFromObstacle.magnitude;
    }

    return avoidance;
}
The PredictCollisions function proactively identifies potential collisions using raycasts. It casts rays in multiple directions in front of the AI and checks for intersections with the obstacle layer. If a collision is detected, the AI is steered away from that direction using a force inversely proportional to the hit distance (closer obstacles exert a stronger avoidance force).
private Vector3 PredictCollisions()
{
    var avoidance = Vector3.zero;

    // Cast rays in multiple directions to predict collisions
    Vector3[] rayDirections = {
        transform.forward,  // Forward
        transform.forward + transform.right,  // Forward-right
        transform.forward - transform.right,  // Forward-left
    };

    foreach (var direction in rayDirections)
    {
        if (Physics.Raycast(transform.position, direction.normalized, out var hit, RaycastDistance, ObstacleLayer))
        {
            // Calculate avoidance force based on the hit direction
            var awayFromObstacle = transform.position - hit.point;
            avoidance += awayFromObstacle.normalized * RaycastAvoidanceForce / hit.distance;
        }
    }

    return avoidance;
}
The OnDrawGizmos function is a visual aid for debugging purposes. It visualizes the obstacle avoidance radius and the raycast directions in the Unity editor scene.
private void OnDrawGizmos()
{
    // Visualize the obstacle avoidance radius in the editor
    Gizmos.color = Color.red;
    Gizmos.DrawWireSphere(transform.position, ObstacleAvoidanceRadius);

    // Visualize raycast directions
    Gizmos.color = Color.blue;
    Gizmos.DrawRay(transform.position, transform.forward * RaycastDistance);
    Gizmos.DrawRay(transform.position, (transform.forward + transform.right).normalized * RaycastDistance);
    Gizmos.DrawRay(transform.position, (transform.forward - transform.right).normalized * RaycastDistance);
}
Improvements
One way we can improve this controller is by making it slower when trying to avoid an obstacle. And we can do that by creating a private variable to store the initial speed and update the MoveSpeed variable when obstacle is detected.
private float m_InitialSpeed;

private void Start()
{
    m_InitialSpeed = MoveSpeed;
}

private void FixedUpdate()
{
    // other code ...
    if (avoidanceDirection.magnitude > 0.1f)
    {
        MoveSpeed = Mathf.Lerp(MoveSpeed, m_InitialSpeed / 2, Time.deltaTime);
    }
    else
    {
        MoveSpeed = Mathf.Lerp(MoveSpeed, m_InitialSpeed, Time.deltaTime);
    }
}
Another improvements we can add is instead of ray casting only forward, left and right we can add more rays for better detection.
Keep in mind that this is a basic chase controller with obstacle avoidance. There is still room for improvements.
Configuring the Scene for the AI Controller
Attach the AIController script to the AI character game object in the Unity inspector. Add a Rigidbody component to the AI character and configure its properties (Mass, Drag, Angular Drag) for appropriate movement. Disable gravity if the ground is flat. Drag the target object into the target field of the AIController script component and hit PLAY.
If you want me to continue writing interesting stuff you can support me via:
